ARTS & CRAFTS
DIY Refractors
A quasi-tutorial

Matt “Doc” Perry, Creative Idiot, Texas
June 13th, 2017
I had seriously considered not publishing this at all. Part of me feels like it’s the trading card equivalent of magicians secrets. In the wrong hands, you could use these notes to create fake cards and to scam people out of real money.
That was a major concern, but I’m a creative person, and by nature I enjoy sharing with people. My enjoyment in creating something overrides my hesitations about people using this for nefarious purposes. Much like guns can be used for good, they can also be used for evil, and in much the same way so can knowledge. I don’t mean to make this sound ridiculously grandiose. It’s not. They’re little pieces of plastic and cardboard. However, in researching all this, I found a very purposeful and distinct “we don’t talk about this” among the card community, especially among people who create custom cards. No one wanted to discuss this. I couldn’t decide whether people were simply keeping it for themselves, or if in some altruistic way they thought they were preventing fraud in the card community. I don’t want to dismiss the later, but I also don’t agree with keeping secrets in what is essentially an art project.

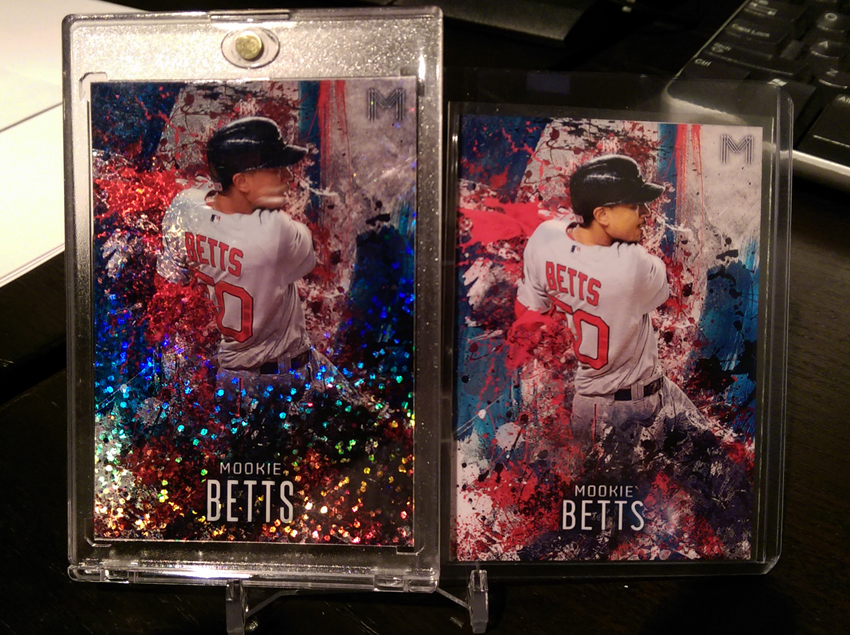
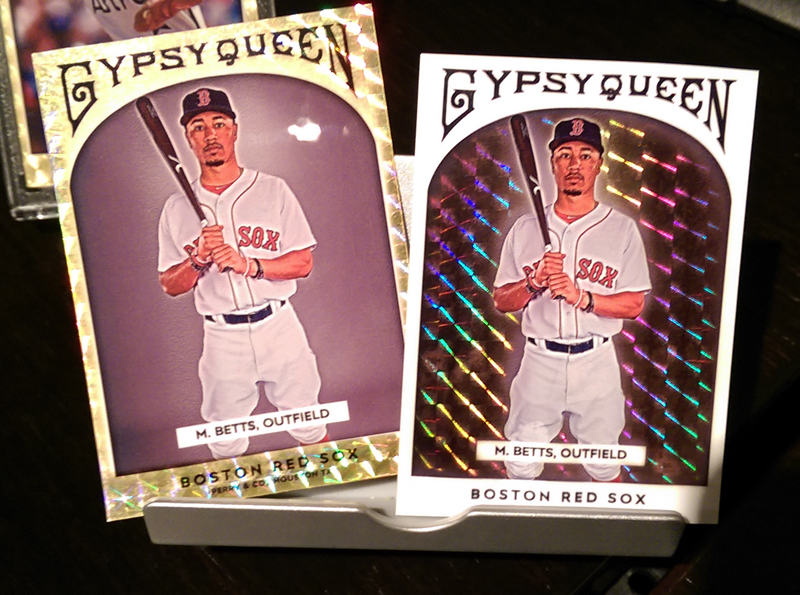
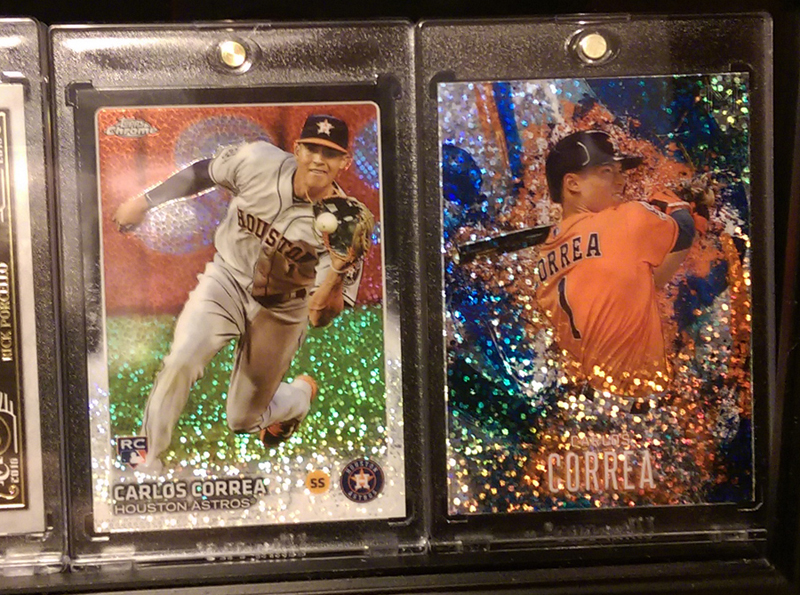
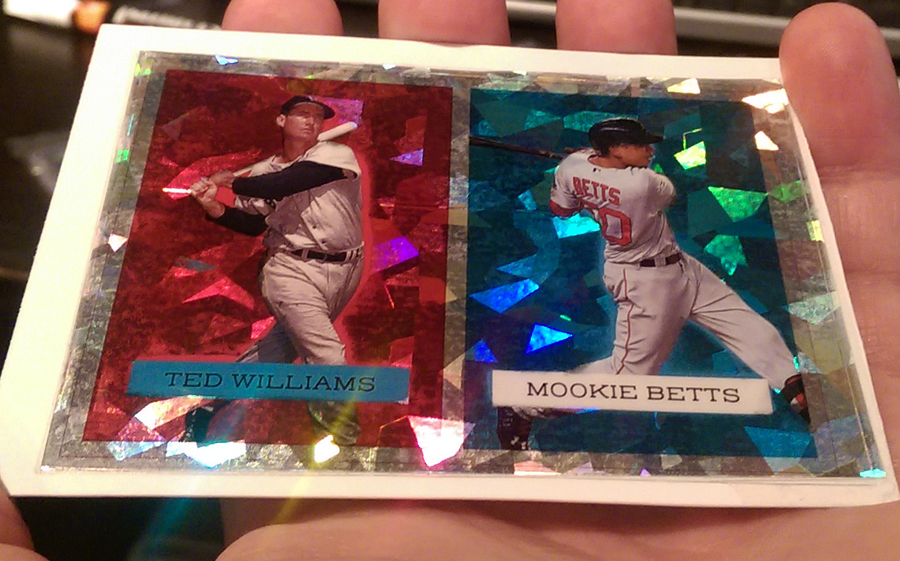
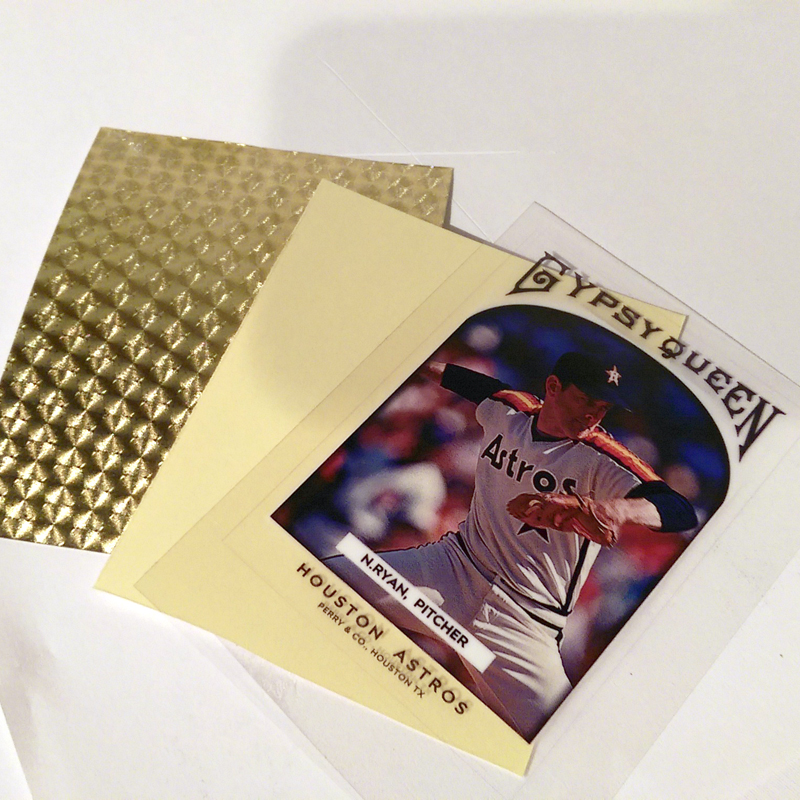
The final results
So, I’ve decided that I’m going to walk through the process of how to make the cards I made. I’m doing this primarily because not a single person was willing to show me how, and that really bothered me. Not that I was entitled to answers, but that a normally open community was suddenly silent. Asking questions, being polite, and trying to have a discussion with other people who I considered artists were often met with scorn or just outright silence. I’ve been thinking about this for years now and perhaps knowing the process will illustrate A) how much work people put into in making customs, and that they should be more appreciated, B) that making high-end customs can be done by YOU at home if you’re willing to put in the effort and, C) that there’s no boogie-man in your arts and crafts closets and that’s it’s ok to talk about this stuff.
“I found a very purposeful and distinct “we don’t talk about this” among the card community”
Let’s start at the beginning. A very good place to start. You’re going to need some supplies. This stuff is NOT cheap. If you’re thinking of making some, you’re going to be in it for about $20 a card. The bright side is that most materials can be used to make more than one card. I’m going to list everything that worked, their prices, where to find them as well as mention things that didn’t work and that you can avoid. I spent money on all the wrong stuff just to find the right stuff. Hopefully you can avoid those mistakes and save yourself a couple bucks.
- Computer Grafix bran inkjet, transparency film – Amazon – $8 for 6 sheets
- Inkjet ink for your printer, a bunch of it – Price varies
- Krylon Gallery Series UV Archival spray, Gloss – Art Supply stores – $12-15 a can
- Valspar “Outdoor Plastic” spray paint, white – HD/Lowes – $6/can OR
- Krylon flat white spray paint – HD/Lowes – $6/can OR
- White paint markers – Art supply stores – $3-4 each OR
- Createx “Wicked Colors” opaque white air brush paint – Art supply stores – $5/bottle
- Central Pneumatic air brush – Harbor Freight – $22
- Air brush accessories – Harbor Freight – $10
- Air compressor – borrowed – free (about $60-80 to buy)
- Strathmore Bristol Board or Illustration Board – Art supply store – $2-3 a sheet
- Silhouette Brand “double sided adhesive sheets” – Amazon – $5 for 8 sheets
- Various metallic/holographic vinyl films, adhesive – local sign shop or art supply stores – $2+ per sheet
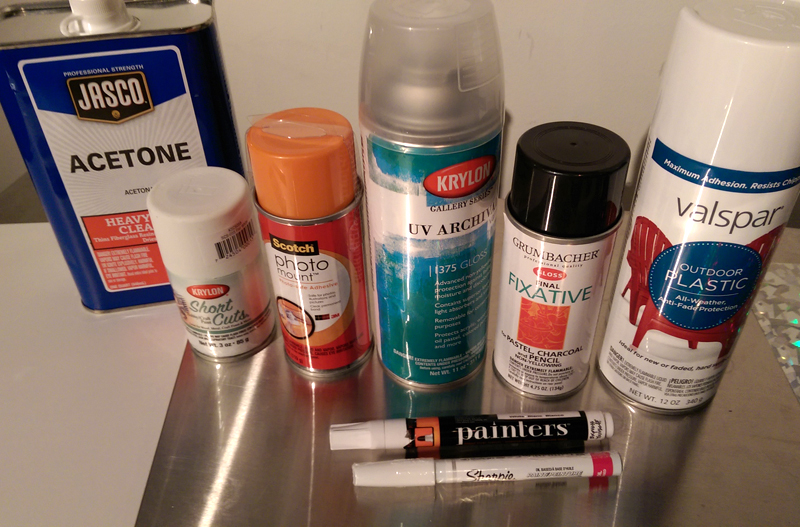
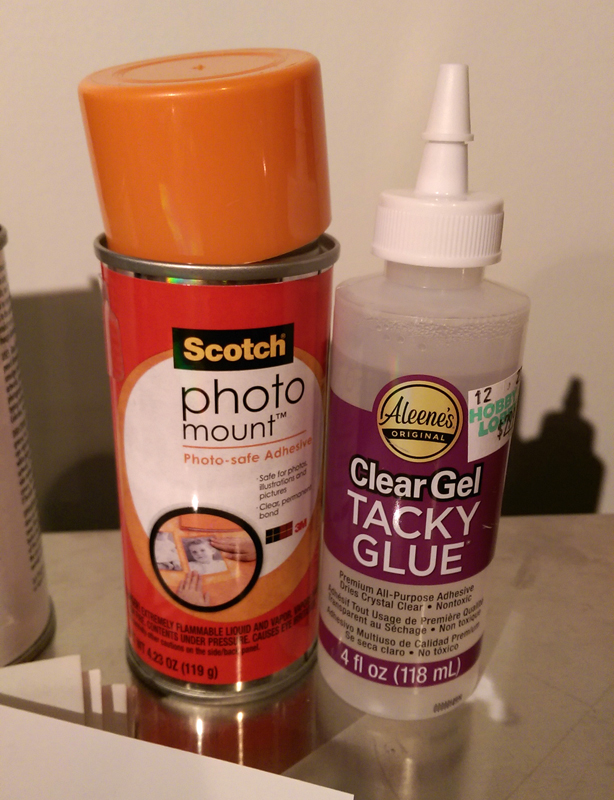
Several spray options, some of which work better than others.
So, I thought I might walk through the process in an abbreviated form, mention what didn’t work, what finally did, and they hit upon some of the finer details. Everyone good with that?
The Basics
What we’re attempting to do is create a card with a transparent top layer, which shows through to a metallic bottom layer. First we’ll have to start with a design which leaves large portions blank/clear or at least semi-transparent, that way the foil can show through. Next, we have to print that design onto a clear surface. At home, the best solution I’ve found for this is “transparency film”, similar to what your teachers used to use for overhead projectors. There are laser and inkjet versions, but unless your corporate laser printer is set up to print fine art, you’re probably best off with inkjet. Now that you’re printed your design, we’re going to create two in-between layers. One, an opaque white section for that part of your designer is easier to see, and a second adhesive layer to put it all together. Next, you’ll need to find a metallic foil or vinyl you like, and put it behind your design, using the adhesive. Next, we stick the whole thing onto thick card stock, illustration board or bristol board. Last, we trim, cross our fingers, and pray that everything we just did doesn’t get destroyed by 0.05mm of poor trimming.
Sound like a fun afternoon?
The Design
The most obvious part of the process is the custom card design. This part right here usually disqualifies most people. Not everyone is wanting to design cards, which is understandable. The custom card community is really really small. There are a few people who do it incredibly well (and I don’t count myself among them) and their work is awesome. For my first super-fractors I wanted to try my hand at one of my all-time favorites. 2011/1887 Gypsy Queen. It’s super simple, it’s not over the top, and it provides a perfect border area for the metallic paper to show through. Remember, that’s our goal with a refractor.
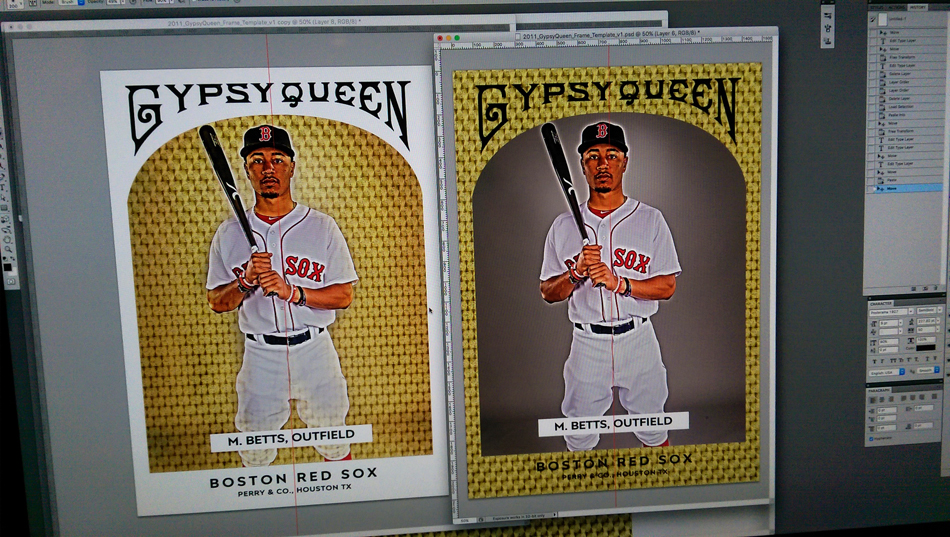
Testing the idea in Photoshop. Always a good idea when the materials are expensive.
These supers were my second try at refractors in general. I wanted to make sure it looks good digitally before I tried it with the materials. My first try was, literally, several rounds of experimentation. I didn’t design the initial cards to actually be refractors. I printed base versions of them on photo paper, which I really like on their own. That’s an important consideration. Should your design actually be a refractor? Also, remember to consider things like the amount of transparency you want. I printed several tests with the gray background behind the player and it slightly mutes the gold color of the foil in the finished version (white border, below). I liked it, so I kept it, but my digital mock-ups were more transparent. Just something worth considering.
I’ve covered design before, so I won’t go any more in-depth with how to go about creating something in Photoshop. Each person has styles that they like and usually a specific goal in mind (I want a refractor of “this” card). This stuff is too expensive just to be making refractors out of everything.
The Printing
Now that we’ve got a design we’re happy with, it’s time to print. I must have tried out four or five printers, multiple brands of transparency, some “printable vellum” which wasn’t, and all sorts of other options. The best, and most consistant things I’ve found is transparency film, specifically the “Computer Grafix” brands. I found some at Hobby Lobby for $8 a pack, which only has six sheets in it, so we’re talking $1+ per page. Luckily, you can fit at least six to eight cards per sheet. Originally I was doing eight, mostly to give myself more chances to get it right, but settled on six in the end. Mostly I wanted to leave a bit more room for trimming and painting around each card.
At home I have an HP PhotoSmart and at work I have several Epsons. I found that Epson ink had real problems sticking to the film. I tried several settings with little success. Perhaps it was the models I have here, but both the Epson Stylus series and the large 9800 had the same issues. The ink wouldn’t penetrate and sat on the surface, never drying. At home, the HP works consistently and produces good results. I’m using max dpi and quality settings and updated the drivers to have the specific “transparency film” profile under the paper type.
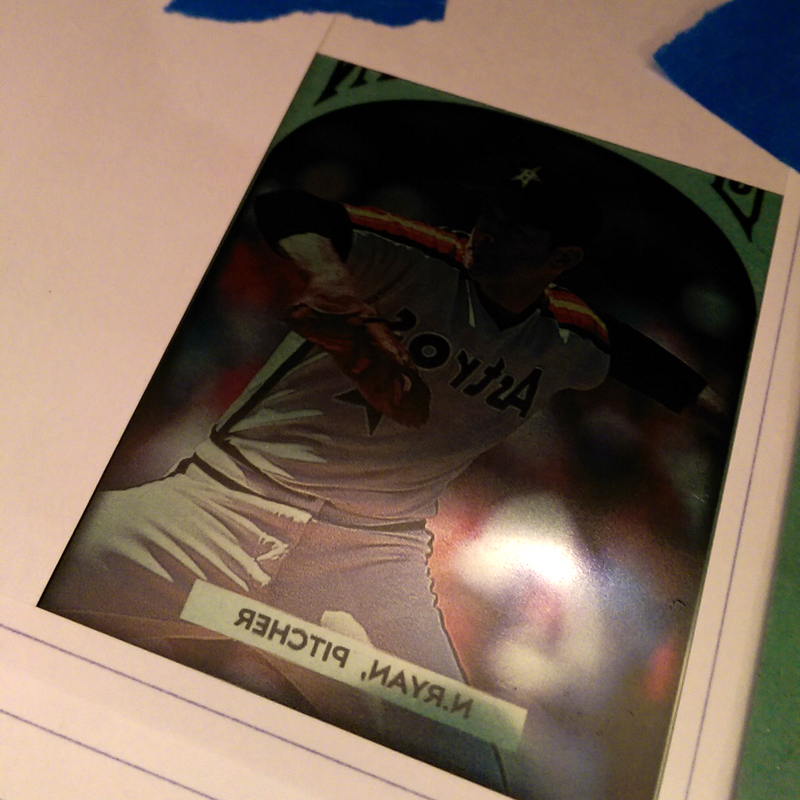
One last thing before you hit print: Remember to reverse your design. You’re printing on something you’re going to be flipping over at the end. It’ll need to be reversed to look right.
Bad ink and poor test results
Much better results
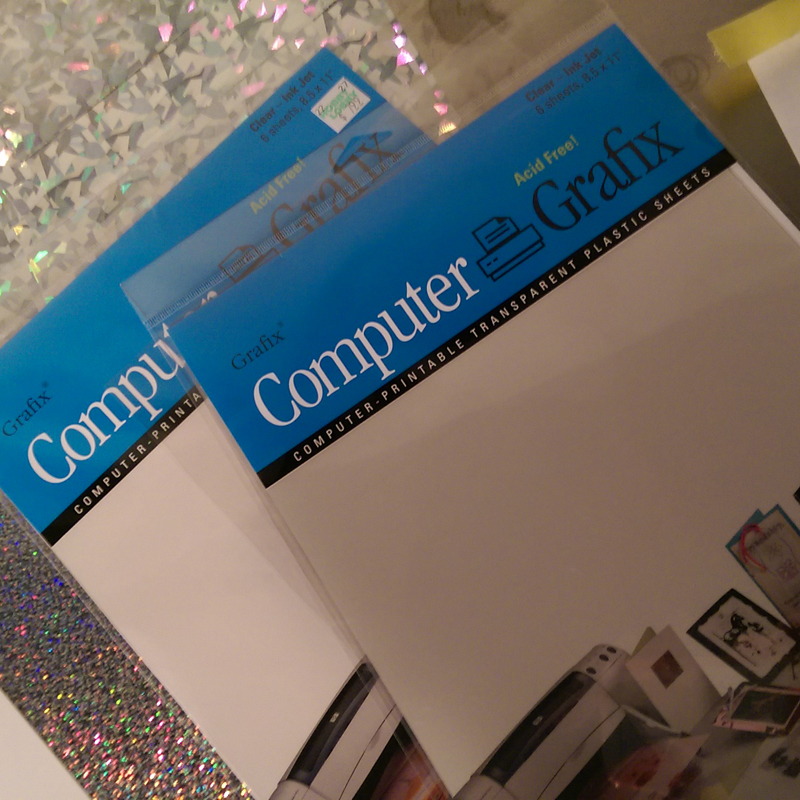
Transparency film
The next step in the print process is twofold. You have to leave considerable time for the transparency to dry AND you need to protect it. You just printed drops of ink onto plastic. It’s only being held on by the thinnest of layers on the transparency itself. If you get it wet, it will bleed. If you look at it wrong, it will kink or scuff. I tend to move mine with other paper (just white printer paper) below it to protect the outside (non-printed surface), and put it someplace safe. After a few hours I dust the printed side off with either a hairdrier, a can of air-duster, or a quick blast from my air compressor. That’s to get rid of any dust that might have settled on it while it was drying. Next, we need to coat this thing to protect it. I tried several workable and permanent fixatives, products that are especially popular with traditional artists working with pencil or charcoal. I settled on Krylon “Gallery” UV Archival spray. It’s expensive, but it goes on very smooth, dries fast, and adds obvious UV protection. I got it in “gloss” because I didn’t want a matte finish to fog the end result. After spraying, again, leave the print to dry for several hours.
The Paint?
Yup, you read that correctly. The paint. “But, but, we’re printing things, right?” Yes, we are, but there’s an important difference between what you and I can print at home and what large commercial printers can do. Take a look in your card collection and find any base Chrome or refractor cards from the past dozen years. You see the player? Are they completely transparent? No, no they’re not. That’s because large commercial printers are using “solvent” based printers, and solvent printers include the ability to print the color white.
That’s not a capability you and I have in our home offices. Commercial printers are printing white (and any color mixed with white) onto the backside of clear material. We need to simulate that the best we can. My first thought was to try “paint markers”, which worked ever so slightly. The main problem is that paint markers are essentially White Out, with the same “crumbly” texture and the complete inability to put a second coat on top of them. Next, I tried actual plain white acrylic paint. That coated better, but left a texture when it dried. After that I tried various brands and types of spray paint. Valspar’s “Outdoor Plastic” seemed to work well in a pinch. It coats well, dries quick and very flat, is specifically designed for plastic, and has a bit of UV protection as well.
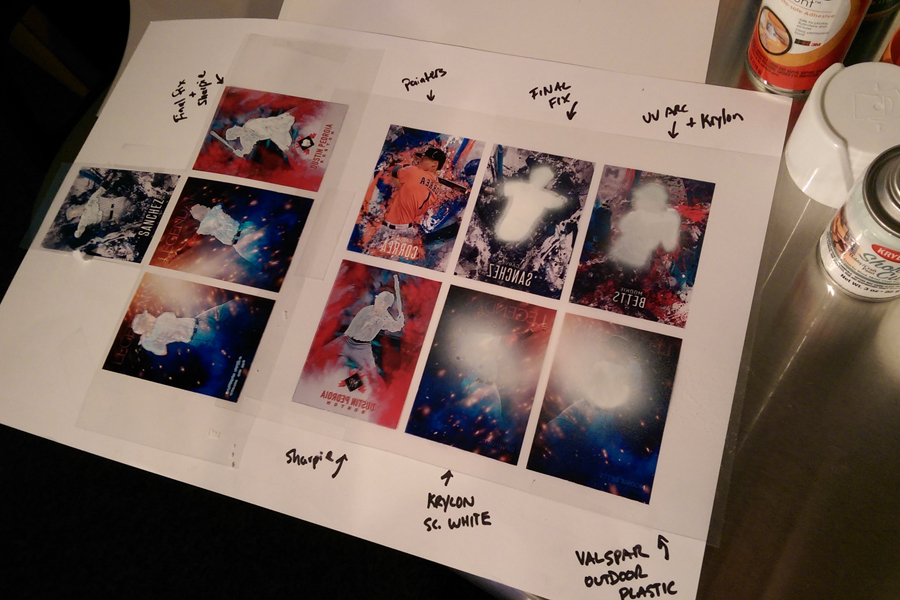
Several tests with various brands and types of paint
While the spray paint worked well, I ultimately decided to try something else. The drawback to a rattle can of paint is lack of control. To get ultra-specific parts of the card painted, and leave others untouched, I was creating cut-outs and templates to spray through. That was leading to a lot of Xacto work and I didn’t feel the results were any better.
At this point, I asked a car enthusiast friend, who recommended air brushing. We went to Harbor Freight and we picked out a $20 air brush kit, a hose and some cleaning supplies. Luckily for me he had an air compressor with the correct attachments that he’s letting me borrow. If you don’t have an air compressor, I was pricing them out and modest ones were well under $100. A basic one would run about $40-50.
After picking up some paint, and with my new air brush ready to roll, I set up a quick “spray booth” (aka: cardboard box) at home to practice. It took a couple hours and a few YouTube tutorials, but I’m starting to get the hang of it. I was masking off one card at a time on the transparency and getting fine enough control with the air brush that I wasn’t worried about the parts I wasn’t covering.
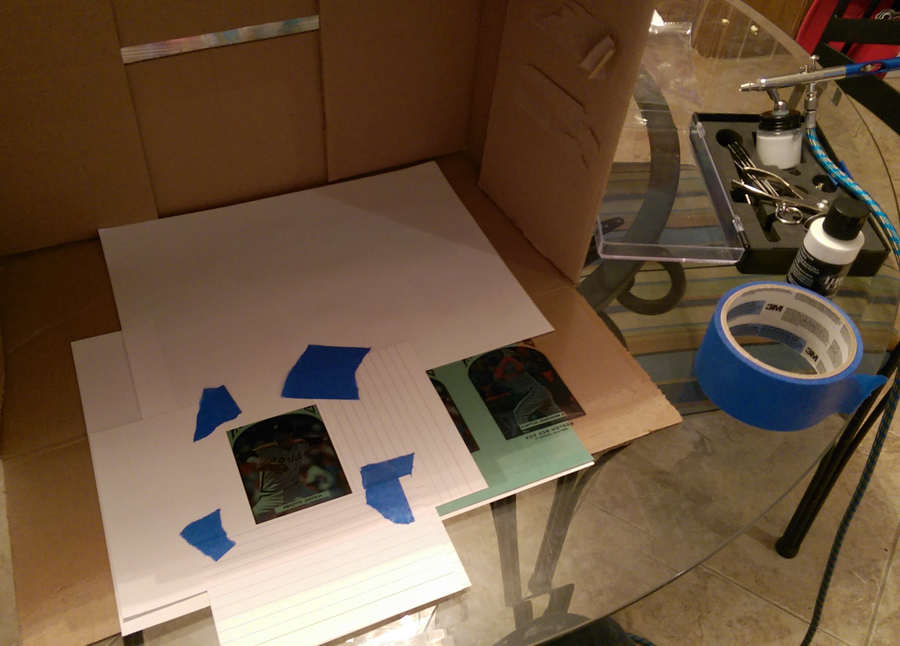
Quick and dirty air brushing box
Masking

After painting

Painting the player only
In case you’re wondering. This is the “secret”. This was one of the hard parts that took a while to figure out. Getting that smooth white, behind the image, without wrecking the transparency. This is the key. That, and this next part…
The Glue
The second hardest part was trying to figure out how to put all the layers together. If you’re keeping up, we’ve now got a designed, printed and painted transparency, but it’s not sticky. It’s not going to stick to any metallic paper we find. I tried, literally, two dozen glues and adhesives. Craft glue that “dries clear”, doesn’t work. Spray adhesive that’s “clear”, doesn’t work. various brands of adhesive sheets, pads, sticker material, etc., all didn’t work.
Here’s an example of a clear spray adhesive…
Spray fail
As you can see, it leaves a film on the backside, a haze, that you can see through the transparency. Call me picky, but I wasn’t happy with them and had to find anything alternative.
The best stuff I can find is a double-sided, clear, acetate sheet that’s made to go in the Silhouette line of craft “cutting machines”. Crafters and scrapbook enthusiast use this stuff to cut out designs and put glitter (or anything else) on a page. I’m obviously not using it for the design itself, but using it in 2.5×3.5″ pieces seems to work perfectly. It’s ultra clear and you can really press down (burnish) on it to get any air bubbles. It’s almost like putting a screen protector on your phone, if you’ve ever done that.
Just say no. These don’t work at all.
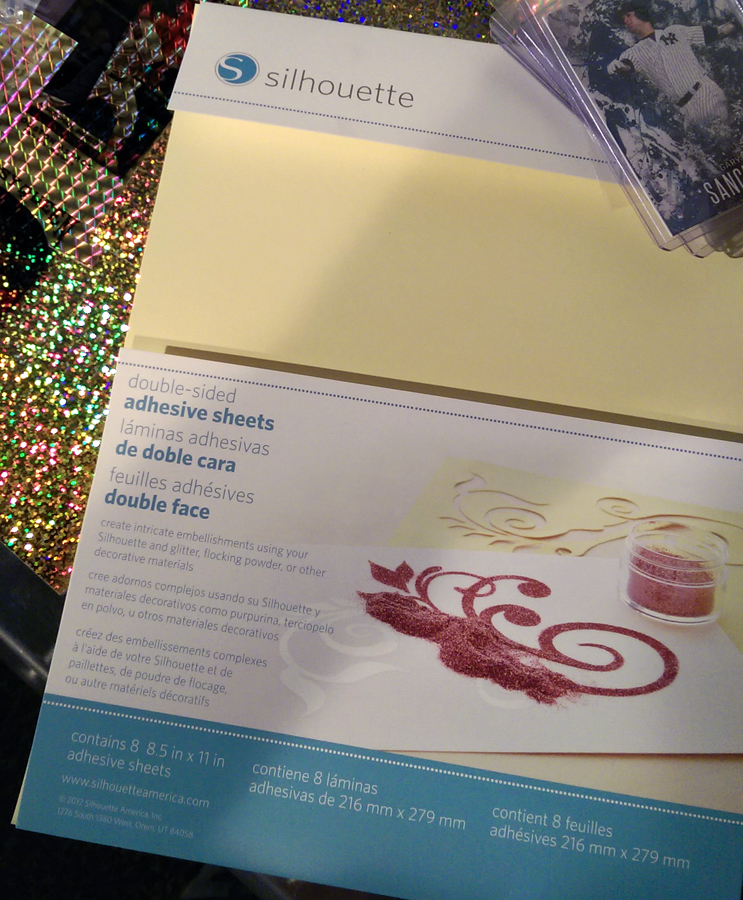
The winner
The Vinyl
The last piece to the puzzle is the material to go behind the transparency. Like I said at the top of the post, I’ve been thinking about printing something like this for years. I’ve researched every metallic paper, every foil, every holographic pattern and finally every vinyl looking for the right stuff. For years I thought I needed to print “on top of” the paper and that they holographic pattern needed to be on the actual paper I was printing on. Here’s a tip: Holographic paper that you can print on (at home), isn’t a thing. That’s why we’re using transparencies in the first place. Commercial printers even have a hard time printing on a glossy, nonporous material. Most of the time it’s a clear sheet with the card design on top of the metallic paper. They’re not printing on the metallic itself.
So, what do we use? Well, the material that comes in the most colors, patterns and finishes is vinyl. The kind of vinyl you’ll find at a sign store, or for making displays and large graphics. There’s a local place near me (The Sign Store) that creates large window displays and marque signs for businesses. Try finding one of those in your area. Next best is eBay, with Hobby Lobby and Micheal’s a distant 3rd. Before I found this local shop, I found a couple patterns on ebay and a basic “sparkle” paper at Hobby Lobby. So long as it’s adhesive backed, you’re good to go.
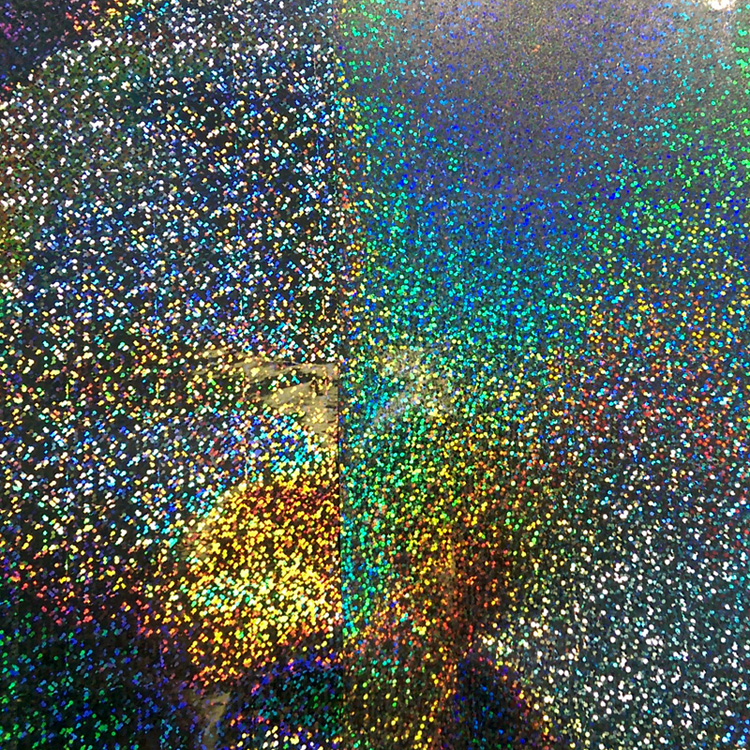
Two kinds of “silver sparkle” found at Hobby Lobby
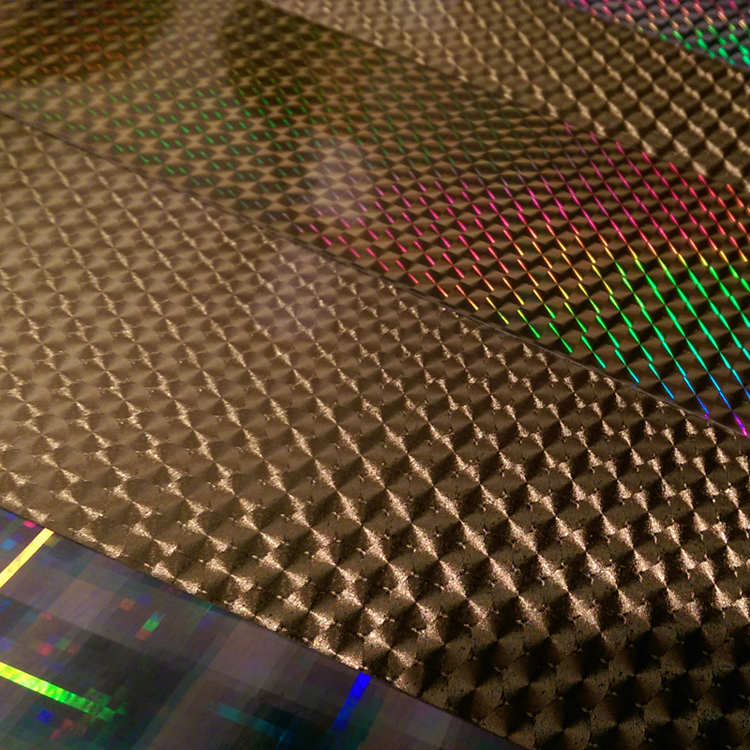
Super material found on EBay
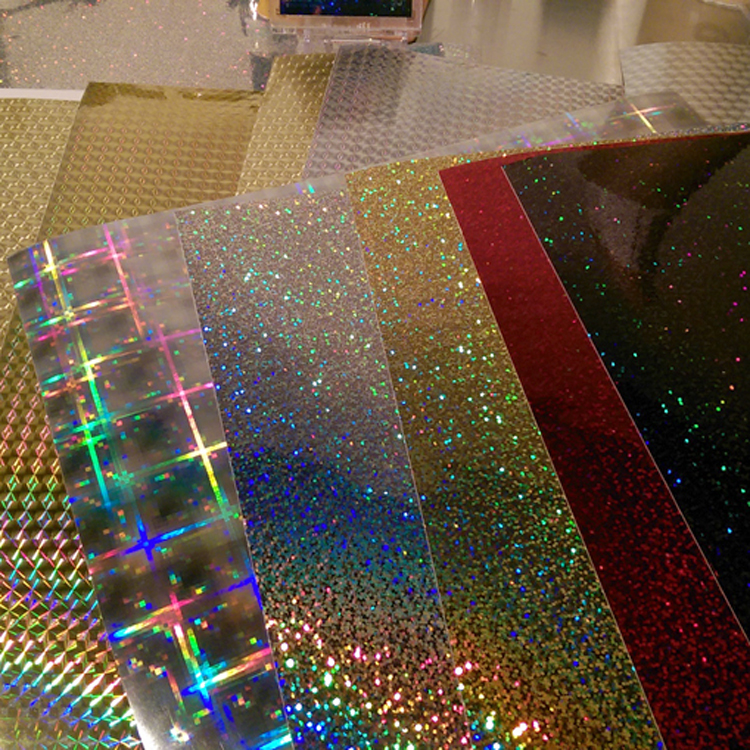
Various colors found at a sign shop
The last secret? Those patterns have names. You’ll never find them by looking for “gold swirl”. Nope. The superfractor pattern, as you card collectors know it, is called “small engine turn gold”.
The Assembly
So, we’ve got our print, we’ve got our adhesive paper, and we’ve got our sparkle. Time to make a card sandwich.

You’ll want a smooth surface to do this on, a soft cloth or burnisher or roller to get rid of the air bubbles, and a steady hand. First, peel off one side of the adhesive paper and stick it to the printed/painted side of the design. Since you printed everything in reverse, this will be the back side. Next, peel off the second backing layer to the adhesive. Place this onto the cut piece of vinyl, making a card sandwich. You should be rubbing air bubbles away the entire time, very similarly to putting a screen protector on a phone or tablet.
Tada! If all goes well, you’ve got a shiny card, albeit un-trimmed, nearly complete. Next, peel the backing off the metallic vinyl. Stick that to your card stock. I made myself some 4×4 blanks of everything, which let’s me assemble all these with room left to trim.
To trim, you’re going to need to either be a wizard with an Xacto knife or have a hand trimmer at home. Try and leave yourself cropmarks on the original design, or you can also stroke the inside of the design with a tiny guideline. You can see that above on the example of bad spray adhesive. You’re looking for clean cuts, so whatever your preferred method of doing that is.

Pre-trimming. Nearly finished!
The Wrap Up
That’s about it. It’s a long and somewhat complicated process, admittedly, but I thought it deserved at least a basic run though. Yes, with this knowledge you can now print fairly good reproductions of actual cards and sell them on ebay and trick people. I hope you won’t do that.
What I do hope is that you think about the design or cards, both professional and amateur customs, and have a new appreciations for some of the materials and techniques that go into them. I hope it spurs your imagination to think about what your favorite card might look like with a little bling. I also hoped you enjoyed reading all that.
If you’re a custom card maker, and I just broke some cardinal rule, “first rule of customs is that we don’t talk about customs”, then I’d love to talk more with you about it. If you have no idea what I’m talking about, and just think cards are neat, that’s cool too.
Thanks for reading everybody!
That was very thorough! Thank you taking the time to take us through the process. While I’ll never be able to do something like this, I really appreciate the effort you put in. Your cards look amazing!
Hmmm… I can only guess at some of the names who might have stonewalled you, but yea, makes sense if it is who I’m thinking about… haha… not a shock, glad you broke the silence and are encouraging others to be creative and enjoy this HOBBY.
Thanks guys! As always, the support is much appreciated!
Excellent tutorial. I appreciate you spilling the beans, so to speak, on a topic that like you said isn’t discussed in the hobby. Custom cards should be for fun and it turn helping others improve their craft.